

- Views (month, weeks, days)
- Month view
- Weekly view
- Day view
- Tasks
- Filter Task Calendar
- Move tasks in the calendar
4.1 Views (month, weeks, days)
![]()
You can access the task calendar by clicking on the icon in the navigation bar at the top. Here you can create new tasks, reschedule, change tasks, or mark them as completed. This gives a great overview of the tasks to be done in your company.
The program automatically adds the tasks “Nursery”, “Seeding” and “Planting” to each planned set, depending on the crop type chosen. In addition, all tasks taken over from the crop by task templates and additionally planned for the set or field are transferred to the task calendar when the set is created.
Accessed on the field or in the transplants-greenhouse on a smartphone, each employee always has their tasks with all the information, can look up crop details and notes, set the time spent on a task and mark it as completed.
Selecting the planned year: To display the year for the task calendar view, use the year switcher from the navigation bar at the top (just like in the crop calendar).
4.1 Views (month, weeks, days)
The task calendar contains three views, a monthly view and the more detailed weekly or daily view. In the week view, a calendar export containing the weekly and daily task overview can be created for printing.
Default view task calendar: In your profile under Settings/Profile in the navigation bar, you can set your preferred default calendar start view.
4.1.1 Month view
 The month view shows the month displayed in the month switcher in the upper left corner. The table shows the calendar weeks and days in each green header field. Switch the months by clicking on the arrows.
If you started from week or day view, switch to month view by clicking “show entire month”.

![]() Tasks in the month view have a colored border around them. Tasks assigned to a person have the name in brackets behind the task name. If more than one person has been assigned to a task, the main person responsible appears in parentheses. The task examples shown, Anzucht (= Nursery) and Pflanzung (=Planting on the bed) are not translated, yet. They are added to the task calendar automatically for each set created and aren´t removable. You can change these tasks in the set details sidebar.
Tasks in the month view have a colored border around them. Tasks assigned to a person have the name in brackets behind the task name. If more than one person has been assigned to a task, the main person responsible appears in parentheses. The task examples shown, Anzucht (= Nursery) and Pflanzung (=Planting on the bed) are not translated, yet. They are added to the task calendar automatically for each set created and aren´t removable. You can change these tasks in the set details sidebar.
Tasks marked as completed are displayed paler and marked with a green tick on the left.
A day field can only display a certain number of tasks in the month view. To see the rest of the tasks, click on “…more…” under the tasks, which opens the more detailed day view.
4.1.2 Weekly view
![]() Access week view by clicking on the calendar week (in the month view on the far left of each week line or from the day view on the top left). Each day for the selected calendar week is displayed here with the planned tasks.
Access week view by clicking on the calendar week (in the month view on the far left of each week line or from the day view on the top left). Each day for the selected calendar week is displayed here with the planned tasks.
![]()
Switch weeks with the week selector forward and backward. With “show entire month” you get to the month view. Click on the plus symbol to create a new task and on the “funnel” symbol to open the task filter.
Calendar export: Click on “Export of week.xlsx” to create an Excel file of the calendar week view. This can then be printed from Excel. All information related to the task is displayed in the export file: Task name, co-worker, number of plants, bed meters, notes, etc.

Calendar Export.
Tasks that are not assigned to a set (e.g., “Team meeting” or “Call Carl”) show the name of the task and, if applicable, the responsible employee. In the case that multiple employees have been assigned to the task, the main responsible person is always displayed its avatar, further assigned employees can be displayed by clicking on […more].
If crop information is also displayed, the task is associated with the set indicated in green font.
By clicking on the set or field/plot name in a task, you can call up the sidebar with the set details or switch directly to the field/plot view.
Individual tasks can be deleted in the weekly view by clicking on the trash can icon. System tasks such as planting, sowing, harvesting can not be deleted.
4.1.3 Day view
![]() Call up the day view, by clicking on the desired day number field in the week line of the month or week view
Call up the day view, by clicking on the desired day number field in the week line of the month or week view
![]()
With the selection field in the upper left corner, you can switch the days forward or backward. All tasks of the selected day are displayed with details and notes.

Day View Calendar.
To get back to the week view, click on the week number in the upper left corner. For month view, click on “show entire month” in the button bar at the top.
In the daily view you can create new tasks by clicking on the “plus” or filter existing tasks on the funnel icon at the top.
To modify a task or mark it as done, click on an empty space in the task bar to open the edit window. Confirm the changes by clicking the green tick on the right bottom.
![]() Delete a task with the “trash can” icon on the right side of the task line.
Delete a task with the “trash can” icon on the right side of the task line.
4.2 Tasks
![]()
Create a task: By clicking on the “plus” symbol (in all calendar views at the top) and selecting “new task” or a stored general task from the menu, you open the creation window for a new task.
Assign the date, a color, and the responsible co-worker, if necessary. You can enter a predefined time for the task or omit the working time field.
Click in the notes field to create a note on the task.
With the selection fields “Set”, “Field” and “Field” you can assign a set or a field with individual fields to the task. To save the task with all its details in the task calendar, click on the checkmark (bottom right). Click on the X next to it to cancel the editing. You can delete the task with the “trash can” symbol above it.

Complete task: Once a person has completed their task, it can be marked as done directly from the mobile app or desktop. Open the task, enter the working time, and click on the “done” button (bottom right). Tasks marked as “done” are indicated by a check mark at the task in the overview.
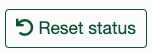
You can revoke the completed status by clicking on “Reset status” (in the editing window of a task marked as completed).
![]() Create Reoccurring task: To schedule a task multiple times with a consistent interval, activate the “Reoccurring Task” checkbox in the task edit window and set a daily or weekly interval and end date. You can choose between a relative date or an absolute date by clicking on the button.
Create Reoccurring task: To schedule a task multiple times with a consistent interval, activate the “Reoccurring Task” checkbox in the task edit window and set a daily or weekly interval and end date. You can choose between a relative date or an absolute date by clicking on the button.
A scheduled reoccurring task can be identified by the symbol to the left of the task name.
Task details:
![]()
Click on a task to display the task details in the sidebar. You can complete, delete or copy a task via the sidebar menu in the upper right.
4.3 Filter Task Calendar
![]()
Click the funnel icon to open the filter sidebar.
Use Open/Completed tasks buttons, to only show open tasks or all tasks already set to “done”.
Click on the “without crop dates” button to hide the tasks (Nursery, Seeding, Planting) automatically generated by the program when creating the set; click on “all” to show again.
To display one or more task types, click on “Type” and select tasks from the menu by checking the respective box.
By selecting a name in the “Co-worker” menu, you can view the tasks assigned to them. You can also view only the tasks assigned to you personally or those of one or more other employees.
Use “Reset filter” button, to deactivate all filter-options and show all tasks again.
A click on the X in the upper right corner, closes the filter window.

![]()
The filter icon appears in light green, while filter options are activated. To restore default view, click on “Reset filter” in the filter window.
4.4 Move tasks in the calendar
Use the drag+drop function in the month and week view in the calendar to move tasks to another day or week. When dragging the task, a visual hint should appear that the task is being moved.
