

Your questions, our answers
General
No, the software can be used without installation with an internet browser on all devices. Just log in on our homepage under “LOGIN”. The Micro-Farm Planner is a web-based software-as-a-service offering that we host on secure servers at Biohost and Webgo in Germany.
For the smartphone version, there is an option to perform an installation to be able to launch the app from the home screen. See the manual under “Smartphone app” for the micro-farm planner.
The software runs in the browser, which means that you only need an internet connection for your computer. We recommend using one of the common browsers, such as Firefox or Chrome. In addition to the so-called desktop version, we also offer a mobile app that you can use on the road and in the field. The desktop version is used for planning and for complex visualizations. Therefore, it is optimal to have a resolution of at least 1200 px in width.
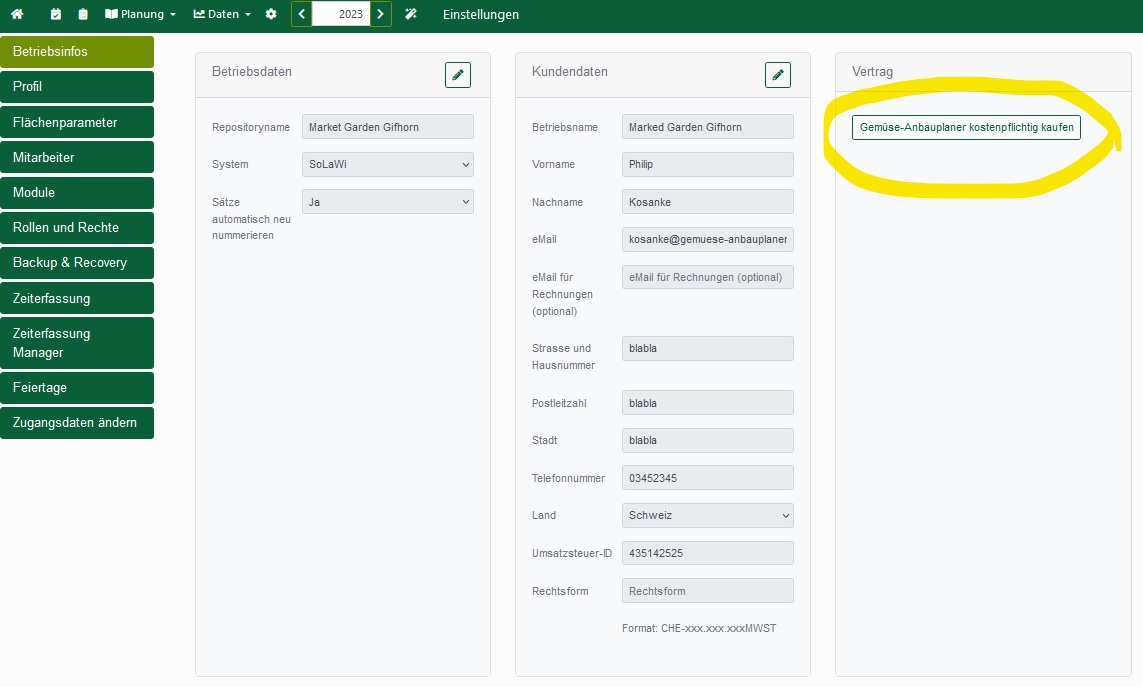
You can buy a trial account directly. After the free trial period expires, you can book one of the three pricing models directly through the app.
Your trial period has already expired? No problem:
If your trial period has already expired, you can log in with your credentials and you will be taken directly to the purchase popup. Fill in all contact details above, then select your price and the payment interval.
Important: Activate the hooks at GTC + data protection. Finally, click on “order” at the bottom.
How to buy the app.
Updates are included in the monthly price and are performed automatically, so the program is always at the cutting edge of technology. There is no maintenance contract with additional costs. We keep you posted about new features in the newsletter after each update.
An overview of past releases can be found in the “Release Notes“:
Directly in the app, the Wizard (click on the magic wand icon next to the year switcher) will quickly tell you everything about the basic Micro-Farm Planner functions. You can also find the current Micro-Farm Planner manual under “Information” – click on the “i” (to the left of the logout button).
Need further help? Arrange a personal consultation (click on “i”/Personal Consultation) directly in the Micro-Farm Planner info menu.
For a new registration click on “14 days free trial” on our homepage. Click on “New registration” in the LOGIN mask and enter all required login data. Confirm your registration by clicking on the “Go to login” link in the invitation mail sent to your specified mail address.
Log in to the program: Enter your login data (e-mail address and password) on our homepage under LOGIN to enter your repository (user environment).
Create new users under Settings/Employees by clicking on “+ create”. Enter the name, if necessary the role* and a valid email address of the person to be invited and click on “Send invitation” (letter symbol).
This will send an automatic invitation mail. The invited person has to accept the invitation (click on “Go to login” in the mail). This activates the new access.
The access data are stored in the invitation, if the invited person does not have access to the Micro-Farm Planner yet. In case of an already existing registration the existing access data are valid.
*The module “Roles and Rights” is available for bookings starting at 35€. Without the module, all users* have administrator rights and the option “Select role” is not available.
If the mail is not in your spam folder: Click on LOGIN on the homepage. At the bottom of the login window click on the option “Resend activation link”. A new invitation mail will be sent to you.
Only one user environment should be created for each company. However, to use the user environment of a partner company, you can be invited by that company. In this way, consultants can also gain access to the program of their client companies (see Invite co-workers/consultants).
If you have activated access to multiple accounts, a selection of your user environments will be displayed in the login window after you have entered your access data.
Click on LOGIN on the home page. At the bottom of the login window, click on the “Forgot password” option. This will send you a new invitation email to the email address used during registration.
You can easily change your mail address yourself in the program (under settings/access data).
When accessing the application via the Login button, the Micro-Farm Planner does not load or only a green wheel appears.
This behavior can have several reasons, it is best to try the following steps to troubleshoot:
1. restart device and clear browser cache: problems loading the app may be related to cached browser data.
2. close the browser and log in to Micro-Farm Planner again.
3. refresh browser window
- Press F5 or the Refresh button in the browser window: on Windows
- COMMAND+R: on MacOS
4. still not working?
- Send us a screenshot of the view with the exact problem description, e.g. “When opening the app, a green cog appears and nothing happens”.
- If an error message appears, please be sure to send it to us or take a screenshot.
This behavior can also be due to several reasons, it is best to try the following troubleshooting steps:
1. restart device and clear browser cache: problems loading the app may be related to cached browser data.
2. close the browser and log in to Micro-Farm Planner again.
3. still not working?
- Send us a screenshot of the view with the exact problem description, e.g. “When opening the app, a green wheel appears and nothing happens”.
- If an error message appears, please be sure to send it to us or take a screenshot.
You run an online store and want to record your goods movements automatically? No problem! The Micro-Farm Planner offers corresponding APIs to query stock levels or to record deliveries and goods receipts. In addition, you can connect your scales to the Micro-Farm Planner. This makes harvest recording a breeze. If you want to have a look at the full range of APIs, you can find the technical description here:
Crops and varieties
Fields and beds